Having TWRP custom recovery app installed and running on our device is without doubt will benefit us -- users who wish to root and get their device to next level -- because on TWRP custom recovery we can perform things impossible to be performed on the stock recovery.
Advertisements.
We can root our device, we can flash custom firmware, we can perform full backups and other things great.
TWRP is the strong contender of CWM recovery and so far they are both the most used recoveries on the Android realm. Some people prefer one compared the other. But we can all admit that TWRP has a better interface and its touch screen utility makes it more interesting and tempting. But of course those are just additional features.
And on this post I will try to guide you to install TWRP recovery on Android by the help of Odin. Odin is the PC based utility and it's said developed by Samsung and later on leaked for public. And now the tool is used not just for upgrade or downgrading our firmware version, it's for non official activities too like rooting and for installing custom reocveries.
With Odin we can flash the TWRP recovery file to our Android phone. Of course we will need a Windows based computer in the process. As Odin is only supporting Windows operating system.
Preconditions.
- A Windows PC and a USB cable.
- Enable USB debugging mode.
- A unlocked bootloader device.
- Backup your current data.
- Make sure you follow the guides and don't skip any steps.
Remember that all the risks that could happen during or after the process are yours to bear.
Advertisements.
How to install TWRP recovery on Android devices.
Files you need.
- TWRP recovery file that supports your device.
- You also need Odin3 (Grab the latest one guys).
- You need to turn your device off.
- Now press and hold the following keys alltogether Volume Down + Home + Power to boot into the download mode.
- When you see the following warning appears on your screen, release all those keys and press Volume Up to access the Download Mode.
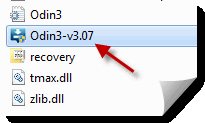
- When your device's in Download Mode, just open Odin (The version I use now is v3-07 & click on it two times).
- When Odin is opened, connect your Android powered device to computer using a USB cable.
- Odin will try to identify your device, when you find Added!!!, that means your device's identified by Odin.
- Click the PDA or PA, that depends on your Odin version. Now search the TWRP recovey file you previously downloaded to your computer. Once you find the file, just click on it.
- Now click the Start button on Odin for beginning the flashing process.
- Once the process is done, you will then see. Pass notification indicating that the process was successful.
- finish.
How to boot into recovery mode on Android device?
After you have installed TWRP recovery mode, it's time to learn on how to enter to that mode. The steps to boot into recovery mode as follow.
- Power off your device.
- Now press and hold these keys at the same time; Power + Home + Volume Up. Keep pressing them until you see your device's logo screen, and release all the three buttons once the logo comes to appear on screen.
- You are now inside the recovery mode / TWRP recovery mode.


comment 0 comments:
more_vertsentiment_satisfied Emoticon