Advertisements.
And Install Android ROMs blog will try to walk you through the whole process manually and the entire steps are compiled neatly so you will follow them easily.
Preconditions.
- Do not flash this firmware if your device is not Samsung Galaxy Tab A 9.7 SM-P550 phone.
- Those who have their device rooted, I tell you that this firmware will wipe out your root access, do not forget that guys.
- If your phoneblet is powered with a custom recovery image will be replaced with a stock recovery image brought by this firmware.
- The flashing procedures require you to have a Windows PC and a USB cable.
- You are advised to also enable your Samsung Galaxy Tab A 9.7 SM-P550 USB Debugging mode.
- Do not start anything without firstly make backups.
- Have a great time guys.
- Download P550XXU1AOH2 Android 5.0.2 Lollipop XXU1AOH2 firmware.
- Download Odin3 v3-07 (If in your computer has Odin, then no need to download it again, just skip this).
How to flash P550XXU1AOH2 Android 5.0.2 Lollipop XXU1AOH2 on the Samsung Galaxy Tab A 9.7 SM-P550
- Now your phoneblet needs to enter the Download Mode, do so by firstly powering off your device and then press these buttons at once; Volume Down + Home + Power.
- The activity will invoke a warning from your phone like on the picture below, thus release the three buttons you are pressing, continue with pressing the Volume Up to get your phone boot into the Download mode.
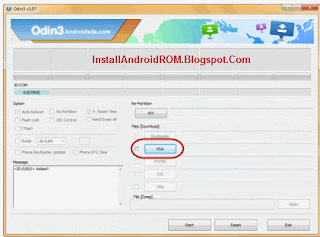
- Launch Odin now.
- Your phone need to be connected to computer now.
- Added!!! will then come up on the message box.
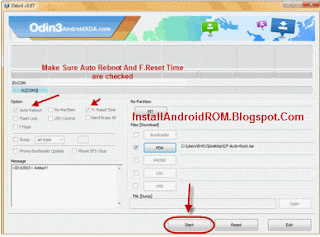
- Click the AP (For Odin3 v3.09 or newer) or tap the PDA (For Odin3 v3.07) button search the firmware file with .tar.md5 extension.
- Click Start button begin the flashing procedures.
- PASS notification will be showing, that means the firmware has been successfully flashed, congratulations.
- Reboot the Samsung Galaxy Tab A 9.7 SM-P550 device now.
Fix bootloop and other errors.Finish now your device is powered with the latest and stablest firmware update from Samsung.
Fixing bootloop can be done by simply performing a factory reset via recovery mode.


comment 0 comments:
more_vertsentiment_satisfied Emoticon