Advertisements.
TWRP is like any other custom recoveries for example CWM, they are offering the abilities to install custom ROM, perform nandroid backups, and so on. It does the same like the stock recovery however it offers more. Let's say this kind of recoveries offering something a stock recovery should has.
And as for TWRP, has more neat interface and can be operated with touches that make it more user friendly. And now all the Samsung Galaxy Star Pro smartphone can install TWRP 2.8.1.0 recovery. You can follow the full instructions from this post right now. At the end your device will be smarter than before guys.
Advertisements.
How to install TWRP recovery on Samsung Galaxy Star Pro.
Preparations.- Remember to only flash the TWRP 2.8.1.0 Recovery package on Samsung Galaxy Star Pro only.
- Be sure your both computer and USB is ready to use.
- Make sure you already enabled USB debugging mode of your Samsung Galaxy Pro Star.
- As always, it is recommended to make necessary backups first.
- Odin will be used on this tutorials.
- Therefore to temporarily disable your Samsung KIES and antivirus of your computer to avoid Odin from running.
- Follow the instructions without skipping anything.
- Good luck guys.
- Download TWRP 2.8.1.0 Recovery package.
- Download Odin_v3.09.zip (Download only if you haven't downloaded before.).
- Power off your phone now so we can boot into the Download Mode, by pressing and holding these buttons together; Volume Down + Home + Power when a warning appears or Samsung logo press Volume Up to enter the Download Mode.
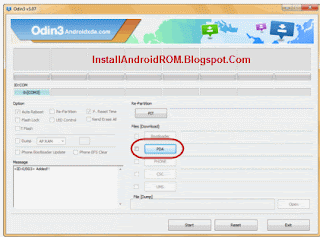
- On Download Mode, then open Odin from your computer.
- Plug your phone to computer now for Odin to detect it.
- Added!!! word will appear, that means your phone is detected, successfully.
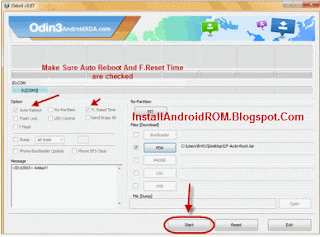
- Now click AP (For Odin3 v3.09 or newer) or tap the PDA (For Odin3 v3.07) button to find the recovery.tar.md5 on your computer.
- Leave other options unticked, then press Start button to start the flashing process.
- PASS will show up (See the picture below). If that so. You should be happy because Odin has done its job.
- Reboot your Samsung Galaxy Star Pro now.


comment 0 comments:
more_vertsentiment_satisfied Emoticon